Search for tasks across a range of year/grade levels and by specific concept or mission name.
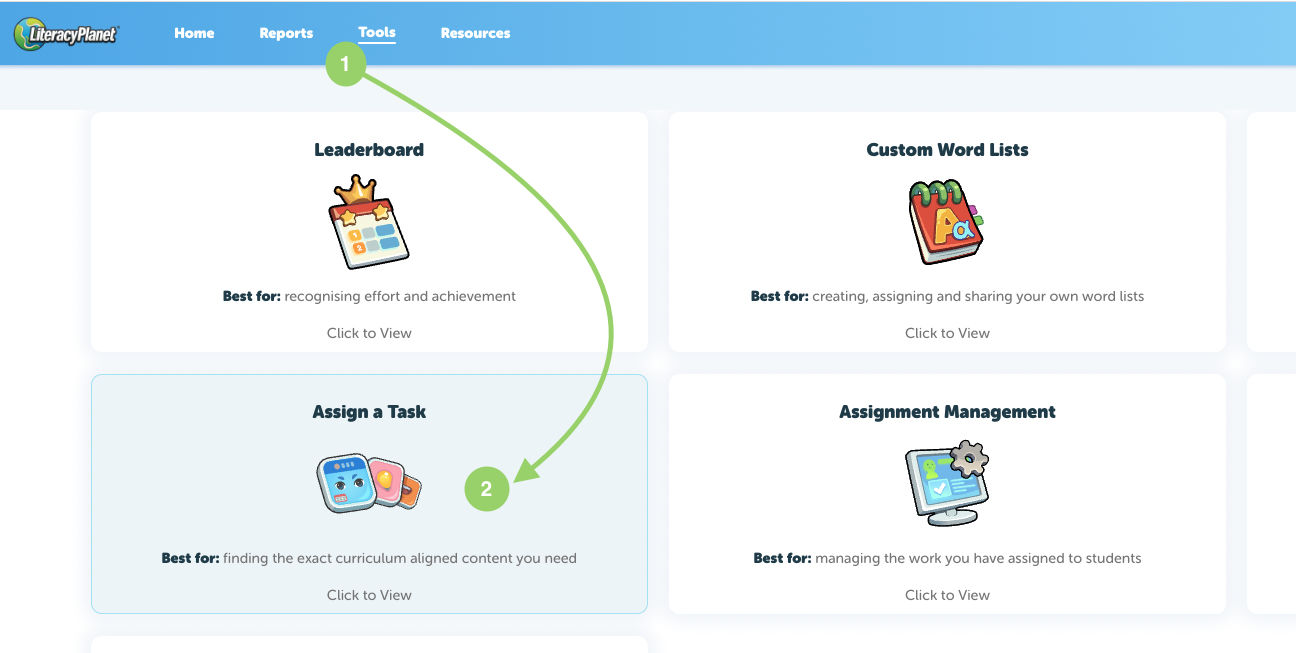
- Click on Tools
- Select Assign Task
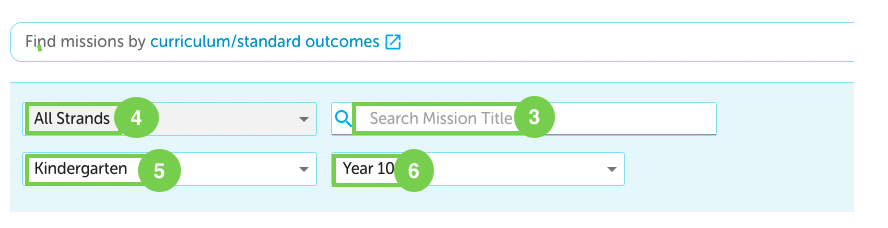
- If you know the Mission name enter here or leave blank
- Choose a Strand from the dropdown box
- Select the Year from in the dropdown box
- Select the Year to in the dropdown box
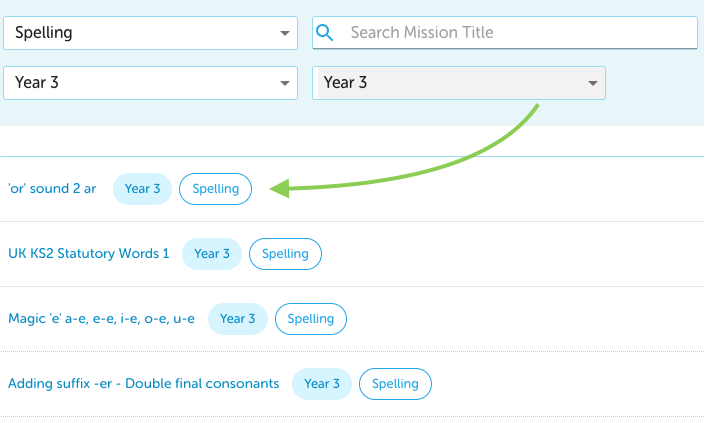
Select the Mission from the options listed:
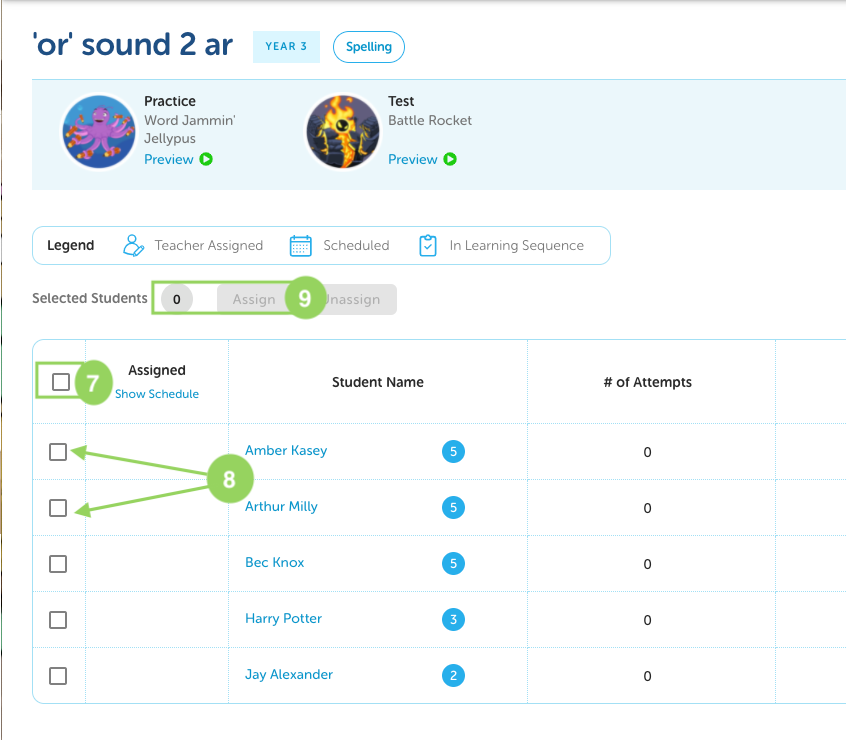
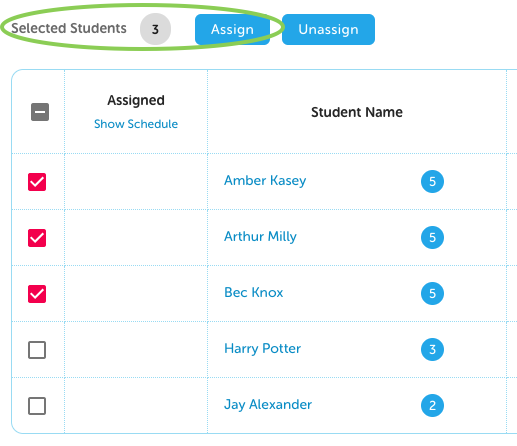
7. Select all students by clicking this checkbox
8. Select individual students here
9. Once student/s are selected the number will appear in Selected Students and the Assign button will become available (turn from grey to blue)
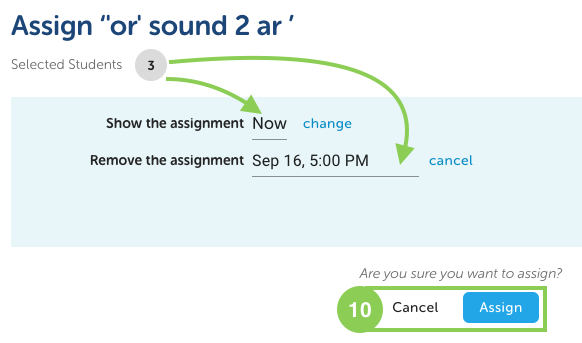
Schedule dates can be set where required:
-
Show the assignment - date/time your student/s will see the assignment
-
Remove the assignment - date/time the assignment will be removed if it is not completed
-
These dates can be blank so the assignment appears immediately with no deletion date if not completed
10. Select Assign and your Mission is now assigned
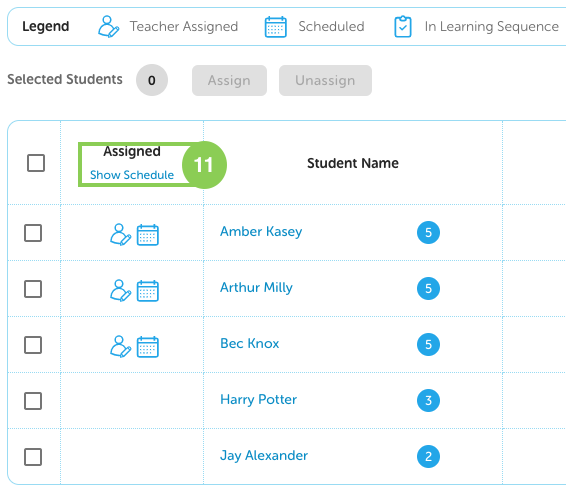
Check in the Assigned column to show how the Mission was assigned (Teacher Assigned, Scheduled or In Learning Sequence).
11. Click on Show Schedule to see the date and time
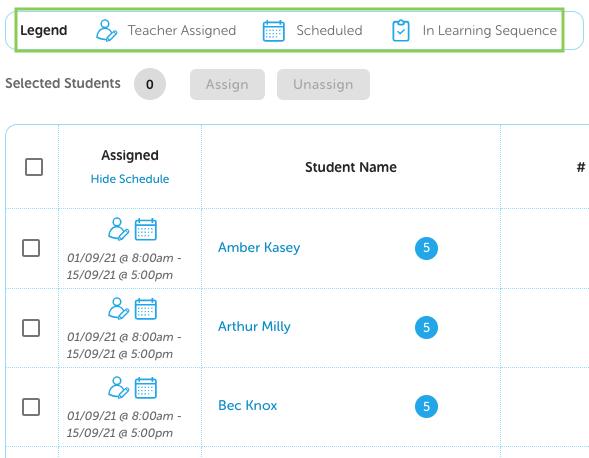
There are three ways missions are assigned and the corresponding symbol appears to represent this:
-
Teacher Assigned = A teacher manually assigned the mission
-
Scheduled = This mission has a scheduled start and end date
-
In Learning Sequence = This mission has been assigned by the LiteracyPlanet platform (missions are automatically assigned when the student is not assigned work by the teacher)
If your student is assigned more than 20 Missions, they will not see all of these Missions when they log into the platform. The LiteracyPlanet platform only loads 20 Missions at a time. If you have assigned more than 20 Missions to your student, as they work through the Missions assigned, more will be loaded as they are completed.